When it comes to setting up various systems or fixtures, installation brackets are key components that ensure stability, support, and alignment. Whether you’re installing shelves, air conditioning units, or mounting heavy equipment, understanding how to install these brackets properly is crucial for both safety and functionality. This step-by-step guide will walk you through the entire process of installing installation brackets like a pro, giving you the knowledge to complete your next project with confidence.
What Are Installation Brackets?
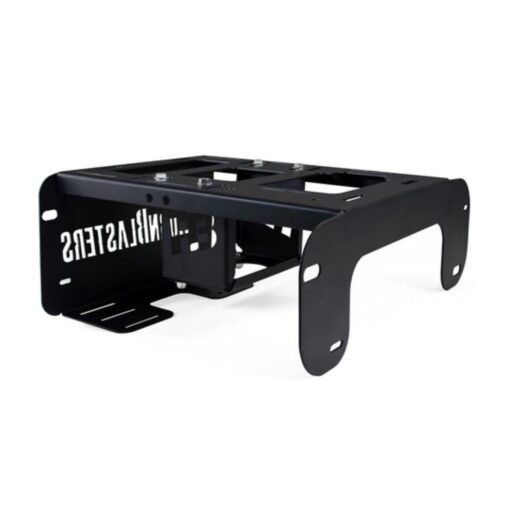
Before we dive into the installation process, it’s important to understand what installation brackets are and why they matter. Installation brackets are metal or plastic components designed to provide support and reinforcement for a variety of objects. They come in different shapes and sizes depending on their intended use. From securing shelves to mounting appliances, these brackets act as a sturdy anchor between your object and the surface it’s attached to, ensuring everything stays in place.
Now that we know what installation brackets are, let’s go over the tools and materials you’ll need to successfully install them.
Tools and Materials You Will Need
Before starting your project, gather all the necessary tools and materials to avoid interruptions later. Here’s a list of what you’ll need:
Tools:
-
Measuring Tape – Essential for ensuring the correct placement of brackets.
-
Level – Ensures your installation is straight and balanced.
-
Drill with Drill Bits – A power drill is crucial for drilling holes into walls or other surfaces.
-
Screwdriver or Impact Driver – For fastening screws into place.
-
Stud Finder (if applicable) – Helps locate the studs behind walls for more secure mounting.
-
Pencil – For marking your drilling points.
-
Wrench – Useful for tightening bolts.
-
Safety Gear – Wear goggles and gloves to protect yourself during installation.
Materials:
-
Installation Brackets – Choose the correct type based on your project.
-
Screws and Bolts – Ensure you have the right size for your brackets.
-
Wall Anchors (if necessary) – Use for mounting on drywall or surfaces without studs.
With these tools and materials ready, let’s move on to the installation process.
Step-by-Step Installation Process
Step 1: Plan and Measure
The first and most important step in any installation project is to plan and measure. Rushing into drilling holes without proper planning can result in uneven installations or even damage to your walls and the object you’re mounting.
-
Measure the Object or Fixture: Take accurate measurements of the item you plan to mount. This will help you determine where the installation brackets should go and how many brackets are needed for the best support.
-
Determine Placement: Decide where you want the object or fixture to be positioned. If you’re mounting a shelf, for example, you may want it centered on the wall or at a specific height.
-
Mark the Spot: Using a pencil, mark where the holes for the brackets will go. Ensure the marks are level by using a measuring tape and level.
Step 2: Locate the Studs
If you’re mounting something heavy, like a shelf or large piece of equipment, it’s crucial to install your brackets into the studs of the wall. This will provide the necessary strength to hold the weight.
-
Use a Stud Finder: Run the stud finder along the wall to locate the studs. Mark the positions of the studs with a pencil.
-
Check the Marked Spots: Double-check your marks to ensure they align properly with the object you’re installing and are at the correct height.
If you’re working with a surface that doesn’t have studs (such as drywall), consider using wall anchors to provide extra support.
Step 3: Drill Holes for the Brackets
Once the measurements and stud locations are marked, it’s time to drill. This step is crucial, so ensure you follow it carefully to avoid any mistakes.
-
Select the Right Drill Bit: Use a drill bit that’s slightly smaller than the screws or bolts you’ll be using to install the brackets. This ensures a tight fit for the fasteners.
-
Drill Pilot Holes: If you’re installing the brackets into studs, drill pilot holes where you’ve marked. These holes should be deep enough to accommodate the screws or bolts you’ll use.
-
Drill Into the Wall: For drywall installations or if you’re using wall anchors, drill the holes accordingly.
Take care when drilling, as drilling too deep or at an angle can cause damage to the wall or brackets.
Step 4: Install the Brackets
Now that the holes are ready, it’s time to install the brackets. This is the moment where everything starts to come together!
-
Position the Brackets: Align the brackets with the drilled holes, ensuring they are level and properly positioned.
-
Insert the Screws or Bolts: Using a screwdriver or impact driver, insert the screws or bolts into the brackets and tighten them. Be sure to use the appropriate size screws for the type of bracket you’re installing.
-
Tighten Securely: It’s important to tighten the screws firmly, but avoid overtightening, which could damage the brackets or wall.
If you’re using multiple brackets, repeat the process for each bracket, ensuring they’re all properly aligned and securely fastened.
Step 5: Test the Installation
Once all the brackets are installed, it’s time to test them.
-
Check for Stability: Gently apply pressure to the object or fixture you’ve mounted to ensure the brackets are holding it securely.
-
Adjust if Necessary: If the object feels wobbly or misaligned, you may need to adjust the brackets by loosening the screws, repositioning, and retightening them.
Step 6: Finish and Clean Up
Finally, once the installation is complete, finish up by cleaning the area and ensuring everything is in its proper place.
-
Remove Excess Tools and Materials: Clear away any debris and unused tools from the installation site.
-
Touch Up Marks: If any pencil marks remain on the wall, gently erase them with a soft cloth or sponge.
Tips for Installing Installation Brackets Like a Pro
-
Use a Level: Always double-check that your brackets are installed evenly. A crooked installation can lead to improper weight distribution or misalignment.
-
Don’t Skip Studs: When mounting heavy objects, always aim for the studs in the wall. They provide the most support and will prevent accidents down the road.
-
Use the Right Fasteners: The screws and bolts you use should be rated for the weight and type of installation you’re doing. Using the wrong fasteners can cause the brackets to fail.
-
Ensure Proper Spacing: If you’re installing multiple brackets, make sure they’re evenly spaced for a balanced look and to provide optimal support.
Conclusion
Installing installation brackets may seem like a daunting task, but with the right tools and a little preparation, you can do it like a pro. Whether you’re mounting shelves, heavy equipment, or any other fixture, following this step-by-step guide will ensure your installation is secure and reliable. By carefully measuring, drilling, and aligning everything, you can create a strong and stable foundation for your items, enhancing both their function and appearance.


